

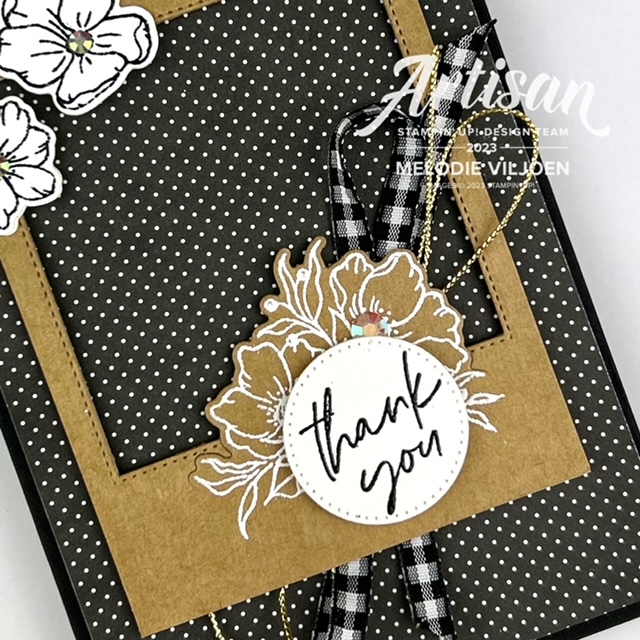
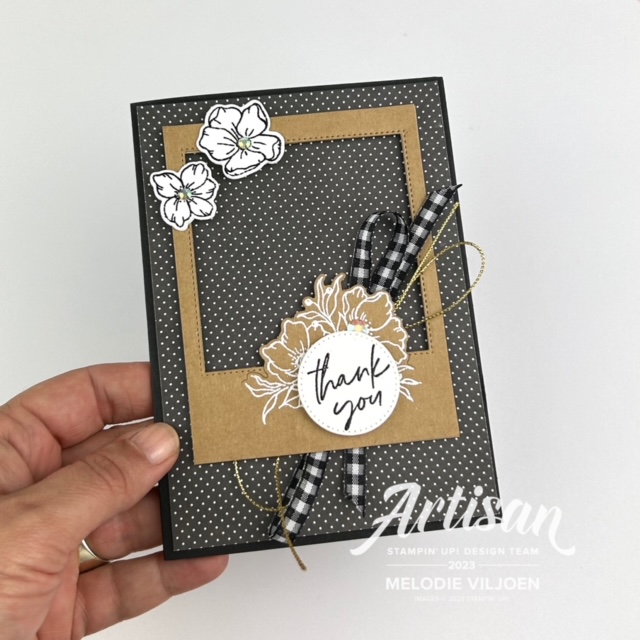
Hello! Today I’m sharing a fun way to create a frame with die cuts (you might already have in your stash)! I used my frame on a card front but I think it will work just as well for a memory keeping layout.
(Click on the images below for a list of suggested products as well as some instructions)

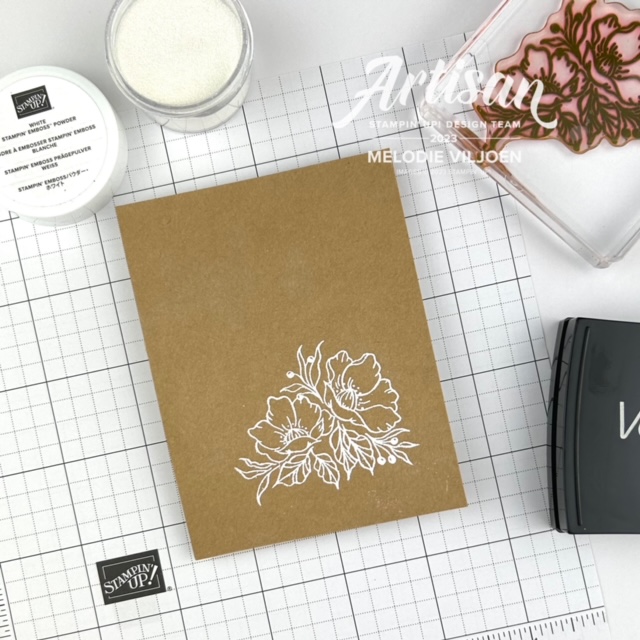
Step 1 – Stamp or heat emboss the floral image from the Framed Florets Stamp Set on to a piece of cardstock measuring 3-1/4″ x 4-1/4″ (8.2cm x 10.7 cm).
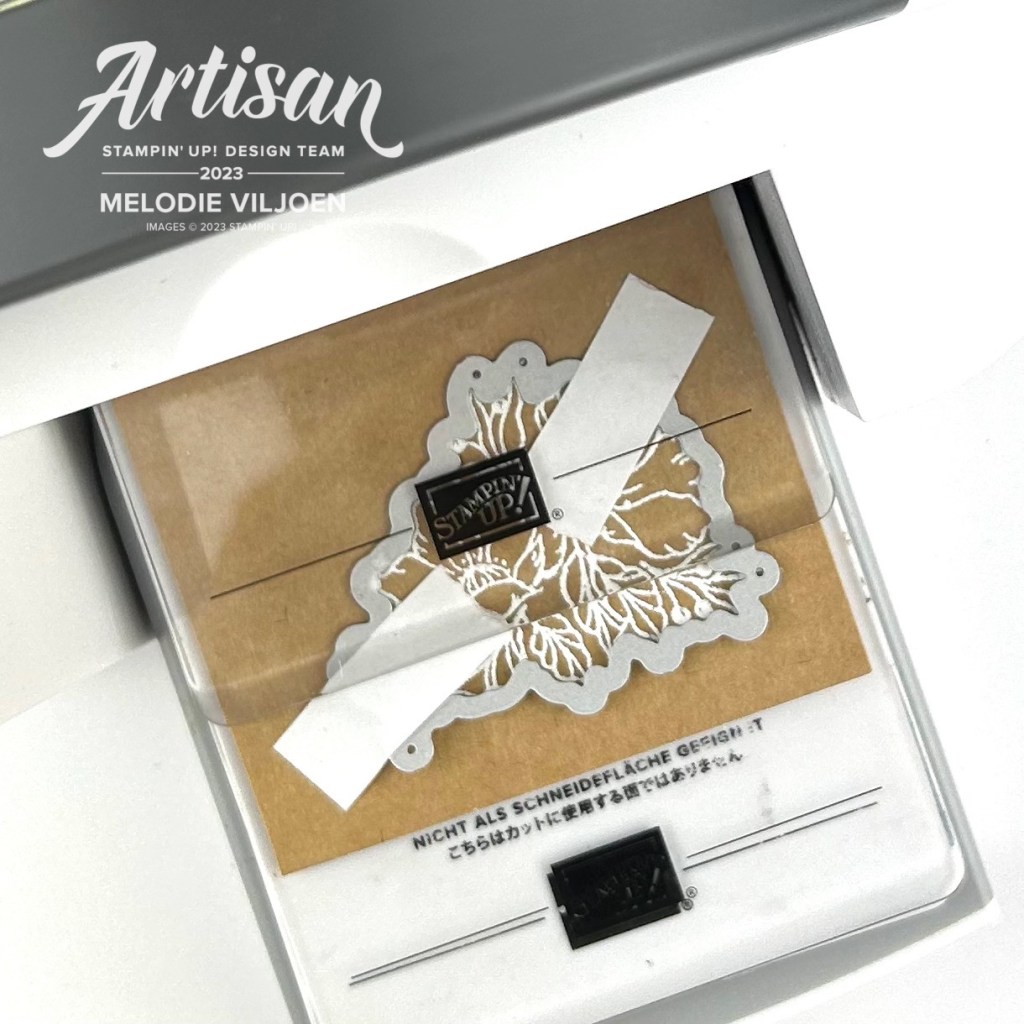
Step 2 – Partially die cut the image with the coordinating die from the Framed Florets Dies. The top cutting plate covers the image only partially.
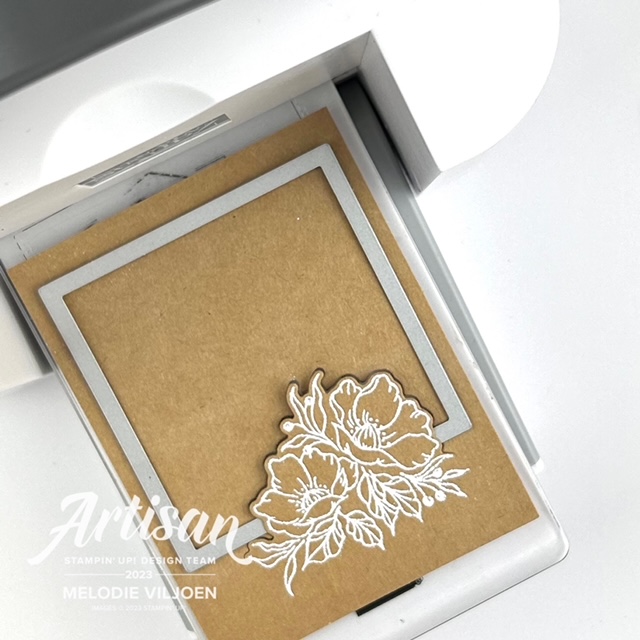
Step 3 – Place the large square die from the Stylish Shapes Dies so the bottom part of the square slides underneath the partially die cut image, then run through your Stampin’ Cut & Emboss Machine.
So easy! You can try it with different bundles and shapes (let me know how you go)!
Thank you so much for stopping by! Happy stamping until next time!
Melodie X
